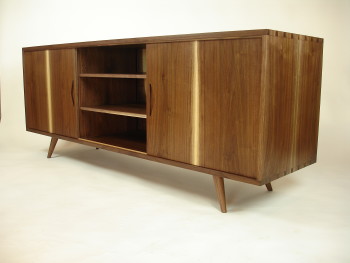
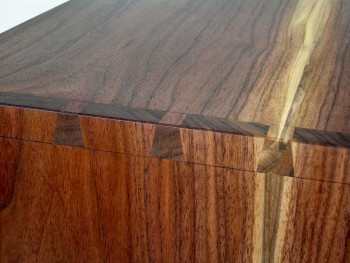
This cabinet has a classic mid century feel. Black walnut, short tapered and flared legs, a low and long stance. Someone commented that it would look right at home in Don Drapers office, to which I smiled. Bingo! And yet, to me the cabinet feels like an original, both in its construction and its aesthetics. Interestingly it’s a cabinet that almost wasn’t, due to some early milling mistakes which almost doomed the project! It all began with one smallish walnut log…
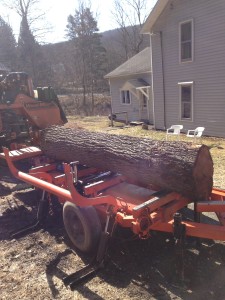
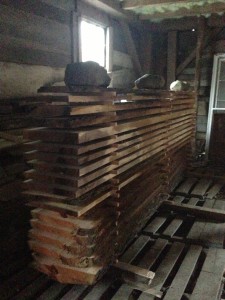
Our neighbor a few houses down had brought down a walnut and a cherry in her yard, and the butt logs lay by the road. She said I was welcome to them, and a friend with a tractor helped me get them to my driveway. Thanks George! A local sawyer brought his rig over and we sawed them up. Not a very big log and not very round, but fairly clear. I stickered it under the barn and forgot about it.
As I began designing this cabinet, I remembered the walnut-it had been down there about 14 months, and I thought it might be perfect for this job. I brought a few boards up, skip planed them lightly and put the moisture meter on them. It’s airy but a bit damp under the barn, and they were at 14%. I was in a rush to start the cabinet and hopefully squeeze it in between some other jobs, so I milled the 5/4 boards to 1 1/16″ and laid out the parts. I needed 20″ total width for the cabinet and there was a wide band of sapwood, so I decided to use it as a central design element. I love using sapwood, and in air dried walnut the contrast to the heartwood can be spectacular. I was hoping for a finished thickness of 15/16″ for the case, so I stickered the boards for two days and remilled them to just under an inch, then glued them up. Pairs of boards formed the case and doors, with a sapwood streak running down the middle. I was able to bookmatch the boards for the case and wrap them right around the sides and top. Cool, I thought. I watched with dismay over the next week as the boards cupped badly. I stickered them in a corner of the shop and gave up for the moment, feeling foolish for rushing the process-I should know better by now! I let them sit for 8 weeks or so and then checked the moisture content-down to 10%! The cupping was rather severe, so some boards had to be ripped again and reglued. In the end, I eked out 3/4″ thickness, which I decided was a blessing in disguise-the thinner boards lightened up the case and now seemed the perfect dimension to my eyes. I was back in business.
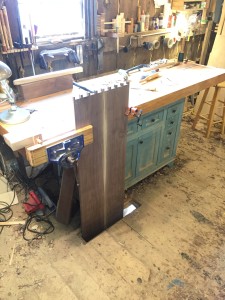
The first task was to through dovetail the case together. Yikes! I’ll talk a bit about dovetailing not because I have a real handle on it, but because there are so many different approaches to this interesting skill. I guess I’d call myself a journeyman dovetailer-not quite a beginner, but far and away from mastery. This time I felt that I had a few breakthroughs and I’m beginning to develop some of my own methods. I like to hold the board vertically while I transfer marks and saw, and this proves interesting when boards are seven feet long. I borrowed a trick from the Cornell Baroque Organ project where the same issue arose and we promptly cut a hole in Chris Lowes shop floor beneath the workbench vise. I figured it was just a matter of time before I would do the same thing in my shop. I smiled as I got out the jigsaw.
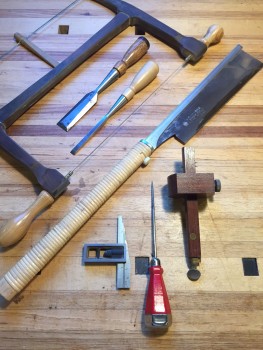
Obviously, stock of consistent thickness is important. The ends must be absolutely square to the face. A steady hand with the marking gauge is also key, as those marks dictate everything and you don’t want to wobble. One thing I do that I haven’t read in any book or article is to polish the end grain of the boards so the marks will show very clearly. I plane the end grain with a sharp block plane and then sand lightly with 320. I’m a tails first guy, so I mark them out and saw. These are the tools I use:
You’ll notice the blade of my square has a slice taken off it. This is a modification I came up with in order to fit the square into the recesses to check for squareness across the board, and it has made a huge difference for me. If you do this, make sure to cut slowly (I used a grinder with a thin cut off wheel) and bathe the cut with water to keep things cool. I was pleased that my square was still square after the surgery. I also use a turning saw with blades and parts available from https://toolsforworkingwood.com/, which I use for cleaning out the waste between pins and tails. Lastly, I have tried various marking knives but have returned to the humble scratch awl for transferring marks to the pin board-if it’s really sharp it tracks perfectly with no fuss at all. This red one is my favorite-I found it in a box of junk in my friends basement.
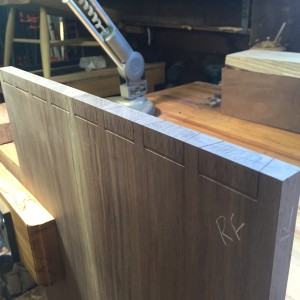
One of my biggest struggles with dovetailing has been chiseling the baseline crisply and without bruising the surface. I’ve developed a rather complicated method but it gives me good results, so I’ll stick with it until I find a simpler way. After sawing to the baseline with the Japanese saw, I lay the board flat on the bench and chisel back to the baseline to about 1/16″ depth. The picture below is of the pin board, but the technique is the same for the tails. I sharpen my chisel till it just about scares the hair off the back of my hand, and push to the score line with the chisel held up about 2 degrees from flat. A slight wiggle can help with control. This first pass takes the most restraint and finesse in order to avoid bruising back the line. I resist the urge to lever the chip upward with the chisel-it’s a constant battle! Levering will without a doubt tear the surface behind the line, leading to mumbled curses or worse. Instead, I hold the chisel vertically and apply pressure in the score line if I need to free the chip. I have not yet touched the mallet!
For the second pass I tap the baseline with the mallet as lightly as I possibly can, then push again to deepen the cut. The third pass I can tap slightly harder, then push the chisel once more. Three passes brings me to about a heavy 1/16″ or 3/32″ depth. Then I remount the board vertically and pick up the turning saw.
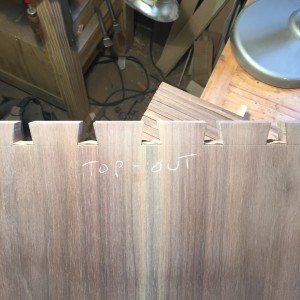
I remove the bulk of the waste with the turning saw, which cuts a wider kerf than my dozuki. Therefore I don’t saw down the existing kerf but instead start a new cut an 1/8″away, then turn sharply about 1/16″ from the baseline and finish the cut. When cleaned out it looks like this:
Now I move the board once again flat on the bench, and easily chop out the last 1/16″ of waste. Some might wonder why I don’t use the turning saw immediately after sawing down to my baselines, then move the board flat on the bench and chop to the baseline. Or, why use the turning saw at all? For myself, I’ve found that those first crucial chisel cuts that define the baseline are much more difficult after sawing out the waste, with only 1/16″ or less material left behind the chisel. Also, having the baseline chiseled to 1/16″ gives me a rock solid visual reference as I use the turning saw. Leaving an 1/8″ or so of material above the line would help, but that in turn becomes more than I can quickly chop out, thus reducing the benefit of using the bow saw. I also find simply chopping all of the waste from both sides to be too slow on 3/4″ or thicker material, so I’m content to move the board back and forth from vice to bench several times, as the benefits seem to out-way the inconvenience.
Ready for the turning saw. Transferring marks to the pin board.
Once the tails are cut and baseline chopped, I sight with my skinny square and lightly pare the walls of the tails absolutely square to the face and straight in line. The back of the chisel is the guide. Then I transfer the marks to the pin board with the scratch awl. Sawing close to the line without destroying it is a skill which only practice can improve. I try to split the line, staying toward the safe side. I saw and chop to the baseline as before, then lightly pare the sides of the pins until the awl marks crumble away. Test fitting comes next, and if all has gone well so far the boards will engage lightly and tap together about a quarter inch. I tap each tail lightly with a metal hammer and listen/feel for the tight spots, marking with a pencil line where I think I might pare. Next I remove the tail board and note where the wood looks burnished, and pare lightly. This is the point where James Krenovs words come to mind concerning “sprung” dovetails. In the past I’ve tried and overdone this a bit, but now I’ve come to realize what a measure of subtlety he is aiming for. The proper curve is basically imperceptable. Some woods are harder than others, and compression is really at the heart of this matter. Snug fitting dovetails must have a certain amount of compression for a great fit. Too much, and things will start splitting. Too little, and there will be gaps, or a limpness out at the edges. So I’ve found that relieving pressure in the middle while retaining actual contact is the goal-this creates real compression at the outer edges, while keeping the assembly from becoming dangerously tight. Very judicious paring is the key. This is the first cabinet where I truly felt that I absorbed and implemented Krenov’s teachings to their fullest, and though I never got to meet him I feel like it brings me closer to who he was.
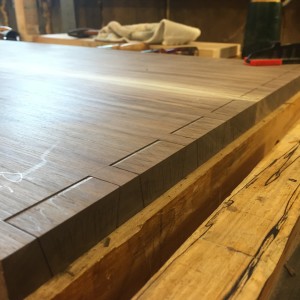
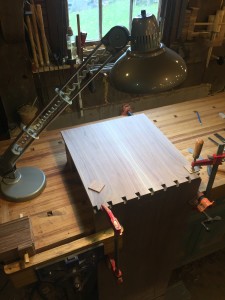
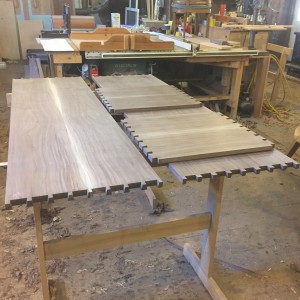
Dovetails finished and test fit. If any reader has suggestions on different dovetailing methods, tips, or tricks, I welcome your comments! Now it’s on to the legs, partitions, doors, shelves, and back. This post has grown much longer than I first intended, so I will continue with part two in the near future.
One response to “Mid Century Modern-part 1, milling and dovetailing”
That is a beautiful piece! Thanks for writing the story of how you made it.