Mid Century Modern-part 2, putting it together

hifi console nov 2015 012

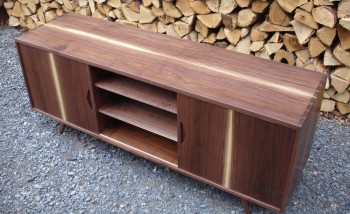
I really love Danish modern furniture.  Flowing lines, elements reduced to pure function and fundamental proportion, a focus on the beauty of the wood itself.  The turned legs on this piece were a central element, but I found myself feeling vexed by the prospect of attaching them to the case.  This shouldn’t be the hard part, right?  I haven’t had the chance to crawl around underneath many quality pieces from this era to see what the Danes would have done, and I was really perplexed.  I have seen a few sofas with a stretcher system tenoned into the legs, but I wanted these legs to join directly to the bottom with nothing interrupting the flow, even when viewed from a low angle.  The prospect of sawing them flush and bolting through the bottom was unacceptable.   I needed an elegant and extremely strong solution with no metal fasteners, so I turned to Windsor chair joinery for the answer.

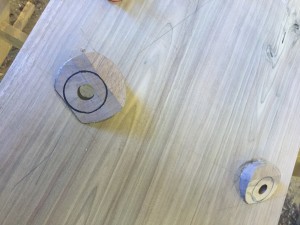
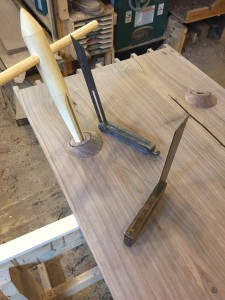
Windsor legs are joined to the seat with tapered tenons, but in this case there were a few wrinkles to iron out.  The bottom of my case was only 3/4″ thick, which is ok but a little thin for a truly strong joint.  Also,  I wanted a shoulder on these legs so that they would meet the case bottom solidly at their widest dimension, as opposed to most Windsor legs which taper down as they meet the underside of the seat.  My solution was to add a round “puck” of wood to each leg location to both thicken the structure and to provide a landing pad perpendicular to the centerline angle of the leg.  A few pictures:

iphone nov 2015 421iphone nov 2015 413

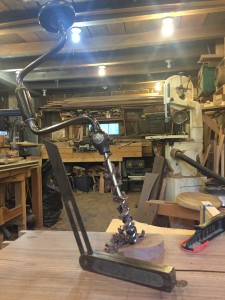
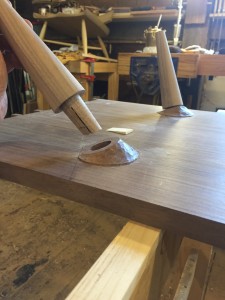
I sawed some 3/4″ material with a compound angle on the ends to match my resultant and sighting angles for the legs, with the grain direction matching the bottom of the case.    These angles derive from the rake and splay angles of the legs as viewed from the front and side-for an explanation of this angle jargon, take a look at a blog post by Peter Galbert, an amazing Windsor chairmaker: http://chairnotes.blogspot.com/2012/04/ive-been-all-over-map-lately-but-i-am.html   Once the wood pucks were glued in place, I drilled 3/4″ holes for the legs and reamed them with my 6 degree reamer made by Tim Manney, another great chair and tool maker:  http://timmanneychairmaker.blogspot.com/

iphone nov 2015 418iphone nov 2015 426

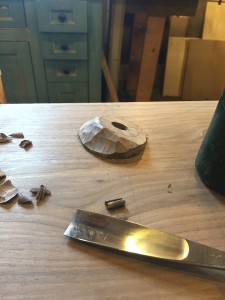
I used a carving gouge to shape the pucks back from the point where the legs meet the landing pad-this maintained the added strength of the assembly while smoothing the transition.

iphone nov 2015 420

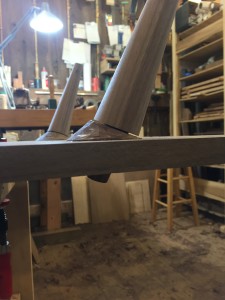
Combining a tapered tenon with a shouldered tenon might seem illogical-using one or the other would seem to make better sense.  However, I felt in this case that it works because of the ability to tune the tapered fit to a very fine tolerance.  I tapered the mortise until the hand fit leg bottomed out solidly with a 3/64″ gap between the shoulder and the landing-on assembly a final hammer blow drove the shoulder tight, leaving a snug mortise/tenon assembly and a tight shoulder.  This was  hot hide glued and finished with a maple wedge from the inside of the case.

iphone nov 2015 430iphone nov 2015 429

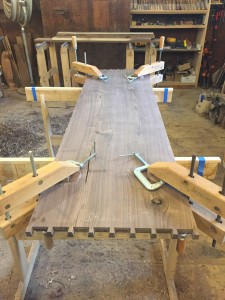
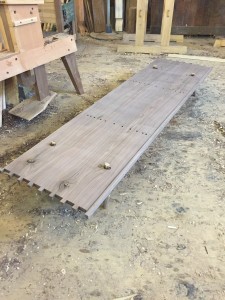
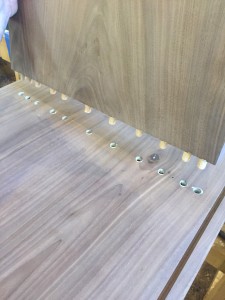
Here is the case bottom with legs glued, back edge rabbeted, front edge routed for sliding door runner, and partition locations doweled.

iphone nov 2015 431iphone nov 2015 434

I’m optimistic about the strength of this leg joint and love the way the legs appear to grow from the bottom of the case.

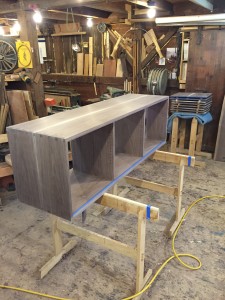
Next, the partitions were glued in place and the dovetailed box glued together.  Getting closer to the finish line now!

iphone nov 2015 440iphone nov 2015 469

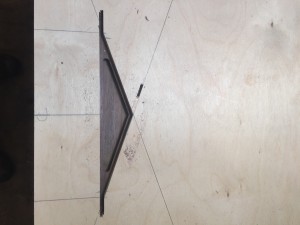
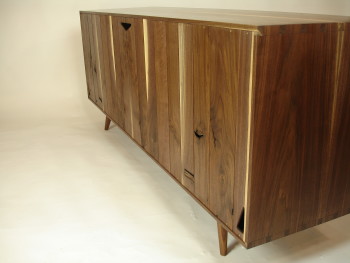
The triangular recessed door pulls were fun-I drew them without much thought and figured I’d seen them somewhere else.  I even searched the internet for a while trying to find a similar design, to no avail.  The angles matched the splay of the legs and just looked good to my eyes.  Well, perhaps I invented them, although I do believe there is nothing new under the sun…

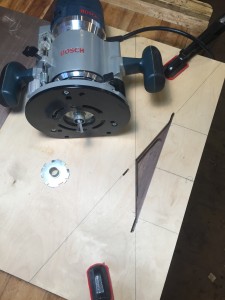
I’m a low tech woodworker and I somewhat despise reaching for the router, but in this case it was the perfect tool for the job.  I used a dovetail bit with two collars to template route the recess and give the pull an undercut edge for good grip.

iphone nov 2015 452iphone nov 2015 453

Making the template was easy, I simply raised the tablesaw blade with the workpiece against the fence for the straight baseline cut.  I drew the angles on the template, extending them all the way across the board.  Then I lined the marks up with the kerf slot on my crosscut sled and again raised the blade to make the cuts.  A small piece of wood fills the kerf at the shallow angle apex.  I routed the recess with two different sized collars, starting with a larger diameter until I got to full depth, then finishing with the smaller collar for a final pass.  This preserved the correct angle at the edge of the recess.  A practice mortise in scrap wood helped me figure this out before ruining my doors!

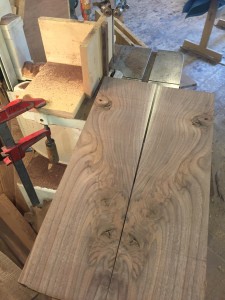
Now it was on to the back-I pondered 1/4″ plywood for about one second.  Nope-wasn’t gonna happen.    I glanced around the shop-so far I had made this whole piece from the single walnut log, and I wished I could finish this way!  I had a stack of knotty, sappy, gnarly cut-offs lying by the bandsaw, dangerously close to the woodstove.  Inspiration struck and I thought to resaw them and create a ship-lap back 1/4″ thick.  As I resawed the boards I was amazed at the beauty of the material.

iphone nov 2015 454

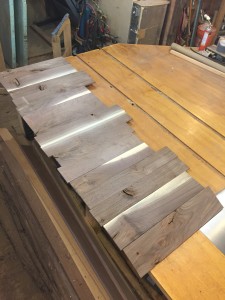
Suddenly knots and holes became landscapes and cat faces, winged angels and waves of light.  I laid out the resawn boards and had another burst of inspiration.  As I set the center boards in a book-matched configuration, I realized that I could continue the book-match outward all the way to the edges of the cabinet.  I played with the arrangement and pondered the balance.  Shuffling boards and composing with the grain is a meditation of sorts, listening to inner voices and waiting until things just feel right.

iphone nov 2015 450

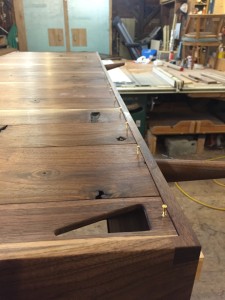
Once the back boards were ship-lapped and fit, I had another light bulb click on regarding the access holes.  This being a hifi/media cabinet, access for power cords and cables was needed.  Drilling round holes didn’t seem to fit with the level of refinement the back was receiving, so I pondered other shapes.  The door pulls!  I turned the triangle horizontally for a top center access, and added a smaller right triangle in each bottom corner.  I attached the back with little brass screws. I like the riveted effect of the fasteners.

iphone nov 2015 470walnut hifi console nov 2015 031

in the end, I find the back of this piece to be perhaps more interesting than the front, and I love the idea that it can be used away from a wall without shame.  Cracks and knots and holes, sap and splits and wild swirls of grain-I love it all.  The soul of a tree.

While delivering this piece of furniture to its new owners I reflected on how much I had enjoyed building it, and how the piece itself seemed to be speaking to me all along, one idea growing into the next.   It’s a humble piece of casework, honest and unpretentious, built to last.  It all began with one walnut log…

Mid Century Modern-part 1, milling and dovetailing

On the heels of a post about Windsor chairs, I’d like to share some thoughts about a Danish Modern console I recently built.   Ever since returning from the chair class I’ve been pondering whether I might begin to focus solely on Windsors, and the desire is certainly very strong.  Sell the table saw and just make chairs!   Well, the bills keep coming so I’ve continued to remodel kitchens and bathrooms, repair old chairs, etc, etc, while also making some interesting furniture.  This latest hifi console cabinet has been a catharsis for me in my quest to balance my green woodworking aspirations with other more machine intensive styles of working wood.  It was a lot of fun to build and helps me realize that I’m not quite ready to leave the machinery behind.

walnut hifi console nov 2015 019

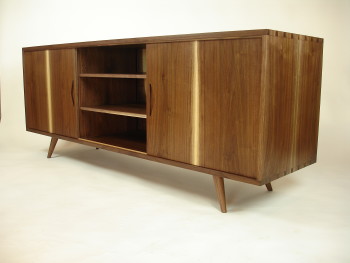
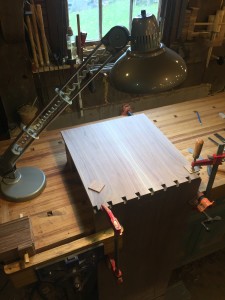
This cabinet has a classic mid century feel.  Black walnut, short tapered and flared legs, a low and long stance.  Someone commented that it would look right at home in Don Drapers office, to which I smiled.  Bingo!  And yet, to me the cabinet feels like an original, both in its construction and its aesthetics. Interestingly it’s a cabinet that almost wasn’t, due to some early milling mistakes which almost doomed the project!  It all began with one smallish walnut log…
iphone spring 2014 391

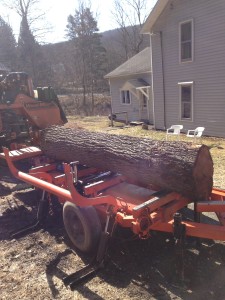
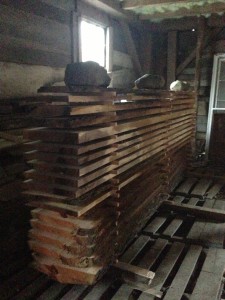
Our neighbor a few houses down had brought down a walnut and a cherry in her yard, and the butt logs lay by the road.  She said I was welcome to them, and a friend with a tractor helped me get them to my driveway.  Thanks George!  A local sawyer brought his rig over and we sawed them up.  Not a very big log and not very round, but fairly clear.  I stickered it under the barn and forgot about it.

iphone spring 2014 398

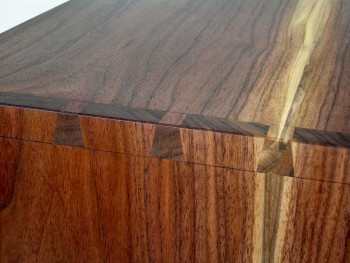
As I began designing this cabinet, I remembered the walnut-it had been down there about 14 months, and I thought it might be perfect for this job.  I brought a few boards up, skip planed them lightly and put the moisture meter on them.  It’s airy but a bit damp under the barn, and they were at 14%.  I was in a rush to start the cabinet and hopefully squeeze it in between some other jobs, so I milled the 5/4 boards to 1 1/16″ and laid out the parts.  I needed 20″ total width for the cabinet and there was a wide band of sapwood, so I decided to use it as a central design element.  I love using sapwood, and in air dried walnut the contrast to the heartwood can be spectacular.  I was hoping for a finished thickness of 15/16″ for the case, so I stickered the boards for two days and remilled them to just under an inch, then glued them up.  Pairs of boards formed the case and doors, with a sapwood streak running down the middle.  I was able to bookmatch the boards for the case and wrap them right around the sides and top.  Cool, I thought.  I watched with dismay over the next week as the boards cupped badly.  I stickered them in a corner of the shop and gave up for the moment, feeling foolish for rushing the process-I should know better by now!   I let them sit for 8 weeks or so and then checked the moisture content-down to 10%!  The cupping was rather severe, so some boards had to be ripped again and reglued.  In the end, I eked out 3/4″ thickness, which I decided was a blessing in disguise-the thinner boards lightened up the case and now seemed the perfect dimension to my eyes.   I was back in business.

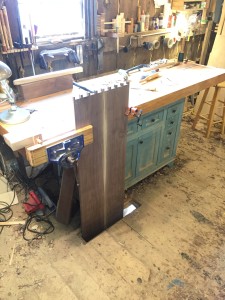
The first task was to through dovetail the case together.  Yikes!  I’ll talk a bit about dovetailing not because I have a real handle on it, but because there are so many different approaches to this interesting skill.  I guess I’d call myself a journeyman dovetailer-not quite a beginner, but far and away from mastery.   This time I felt that I had a few breakthroughs and I’m beginning to develop some of my own methods.  I like to hold the board vertically while I transfer marks and saw, and this proves interesting when boards are seven feet long.  I borrowed a trick from the Cornell Baroque Organ project where the same issue arose and we promptly cut a hole in Chris Lowes shop floor beneath the workbench vise.  I figured it was just a matter of time before I would do the same thing in my shop.  I smiled as I got out the jigsaw.

iphone nov 2015 393

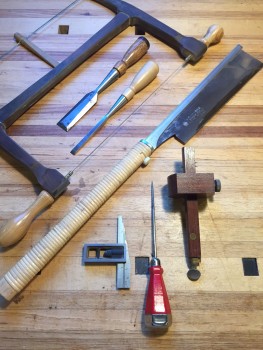
Obviously, stock of consistent thickness is important.   The ends must be absolutely square to the face.  A steady hand with the marking gauge is also key, as those marks dictate everything and you don’t want to wobble.    One thing I do that I haven’t read in any book or article is to polish the end grain of the boards so the marks will show very clearly.  I plane the end grain with a sharp block plane and then sand lightly with 320.  I’m a tails first guy, so I mark them out and saw.   These are the tools I use:

IMG_1644

You’ll notice the blade of my square has a slice taken off it.  This is a modification I came up with in order to fit the square into the recesses to check for squareness across the board, and it has made a huge difference for me.  If you do this, make sure to cut slowly (I used a grinder with a thin cut off wheel) and bathe the cut with water to keep things cool.  I was pleased that my square was still square after the surgery.  I also use a turning saw with blades and parts available from https://toolsforworkingwood.com/, which I use for cleaning out the waste between pins and tails.   Lastly,  I have tried various marking knives but have returned to the humble scratch awl for transferring marks to the pin board-if it’s really sharp it tracks perfectly with no fuss at all.  This red one is my favorite-I found it in a box of junk in my friends basement.

One of my biggest struggles with dovetailing has been chiseling the baseline crisply and without bruising the surface.  I’ve developed a rather complicated method but it gives me good results, so I’ll stick with it until I find a simpler way.  After sawing to the baseline with the Japanese saw, I lay the board flat on the bench and chisel back to the baseline to about 1/16″ depth.  The picture below is of the pin board, but the technique is the same for the tails.  I sharpen my chisel till it just about scares the hair off the back of my hand, and push to the score line with the chisel held up about 2 degrees from flat.   A slight wiggle can help with control.  This first pass takes the most restraint and finesse in order to avoid bruising back the line.   I resist the urge to lever the chip upward with the chisel-it’s a constant battle!  Levering will without a doubt tear the surface behind the line, leading to mumbled curses or worse.  Instead, I hold the chisel vertically and apply pressure in the score line if I need to free the chip.  I have not yet touched the mallet!

iphone nov 2015 401

For the second pass I tap the baseline with the mallet as lightly as I possibly can, then push again to deepen the cut.  The third pass I can tap slightly harder, then push the chisel once more.  Three passes brings me to about a heavy 1/16″ or 3/32″ depth.  Then I remount the board vertically and pick up the turning saw.

I remove the bulk of the waste with the turning saw, which cuts a wider kerf than my dozuki.  Therefore I don’t saw down the existing kerf but instead start a new cut an 1/8″away, then turn sharply about 1/16″ from the baseline and finish the cut.  When cleaned out it looks like this:

iphone nov 2015 400

Now I move the board once again flat on the bench, and easily chop out the last 1/16″ of waste.  Some might wonder why I don’t use the turning saw immediately after sawing down to my baselines, then move the board flat on the bench and chop to the baseline.  Or, why use the turning saw at all?  For myself, I’ve found that those first crucial chisel cuts that define the baseline are much more difficult after sawing out the waste, with only  1/16″ or less material left behind the chisel.  Also, having the baseline chiseled to 1/16″ gives me a rock solid visual reference as I use the turning saw.  Leaving an 1/8″ or so of material above the line would help, but that in turn becomes more than I can quickly chop out, thus reducing the benefit of using the bow saw.  I also find simply chopping all of the waste from both sides to be too slow on 3/4″ or thicker material, so I’m content to move the board back and forth from vice to bench several times, as the benefits seem to out-way the inconvenience.

Ready for the turning saw.    Transferring marks to the pin board.

iphone nov 2015 402iphone nov 2015 392

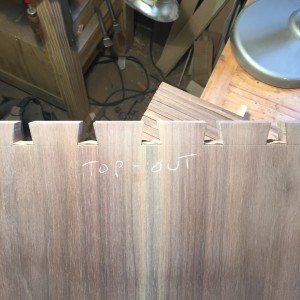
Once the tails are cut and baseline chopped, I sight with my skinny square and lightly pare the walls of the tails absolutely square to the face and straight in line.  The back of the chisel is the guide.  Then I transfer the marks to the pin board with the scratch awl.  Sawing close to the line without destroying it is a skill which only practice can improve.  I try to split the line, staying toward the safe side.  I saw and chop to the baseline as before, then lightly pare the sides of the pins until the awl marks crumble away.  Test fitting comes next, and if all has gone well so far the boards will engage lightly and tap together about a quarter inch.  I tap each tail lightly with a metal hammer and listen/feel for the tight spots, marking with a pencil line where I think I might pare.  Next I remove the tail board and note where the wood looks burnished, and pare lightly.  This is the point where James Krenovs words come to mind concerning “sprung” dovetails.  In the past I’ve tried and overdone this a bit, but now I’ve come to realize what a measure of subtlety he is aiming for.  The proper curve is basically imperceptable.    Some woods are harder than others, and compression is really at the heart of this matter.  Snug fitting dovetails must have a certain amount of compression for a great fit.  Too much, and things will start splitting.  Too little, and there will be gaps, or a limpness out at the edges.  So I’ve found that relieving pressure in the middle while retaining actual contact is the goal-this creates real compression at the outer edges, while keeping the assembly from becoming dangerously tight.  Very judicious paring is the key.  This is the first cabinet where I truly felt that I absorbed and implemented Krenov’s teachings to their fullest, and though I never got to meet him I feel like it brings me closer to who he was.

iphone nov 2015 404

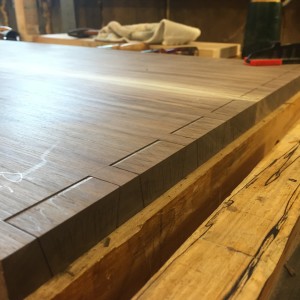
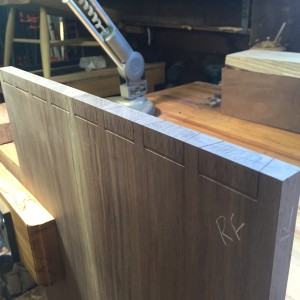
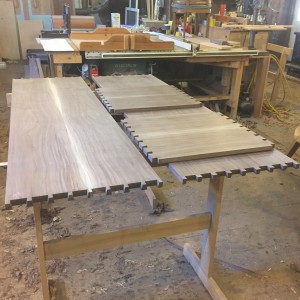
Dovetails finished and test fit.  If any reader has suggestions on different dovetailing methods, tips, or tricks, I welcome your comments!   Now it’s on to the legs, partitions, doors, shelves, and back.  This post has grown much longer than I first intended, so I will continue with part two in the near future.

walnut hifi console nov 2015 027

A week in Tennessee


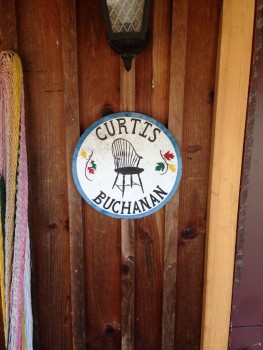
In early March of 2014, I loaded some camping gear into my rusty 2003 Kia Spectra and headed south on interstate 81, feeling the wind at my back as I cruised toward the unknown.  I was headed to the shop of Curtis Buchanan, a Windsor chair maker in Jonesborough, Tennessee, for a week long chair building class.  My mind was brimming with excitement and I felt that I was heading into a vision quest, a grand adventure, a journey of self discovery and new horizons.  I had no idea what a dramatic transformation I was in for.

Up until this point, I felt I had a pretty clear idea about the basics of furniture making.  You needed electricity,  a table saw, band saw, jointer, planer, router, electric drill, and various sanders, at a minimum.  Kiln dried boards were essential.  A spray booth was really helpful.  Hearing protection, eye protection, lung protection, and constant vigilance around the machines-these were also givens.  Sharpening skills and hand tools were only part of the equation.  This was the path I was on.  Little did I know that my week in Tennessee was about to spin me on my head, challenge literally everything I thought I knew about my trade,  and open the door to a parallel universe of fine woodcraft that was hiding in plain sight, the evidence all around me, though I could scarcely see it.  Indeed, there was another road…
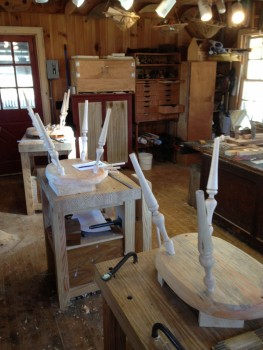
In the year prior to the class, I had bought a stack of used Woodwork magazines, which featured a different woodworker in each issue.  I often find the life stories and insights of woodworkers to be as fascinating as the work itself.    It’s really all about people and human connection at the core, isn’t it?   On the cover of issue #103 from Feb 2007, Curtis is pictured at his shaving horse, curls of oak rolling off the edge of a drawknife.  Hmm, what was this all about?  His words and the photographs of his chairs hit me like a lightning bolt.  Prior to this I had never even really noticed Windsor chairs.  Perhaps  because we are surrounded, literally, by a sea of poorly made factory Windsor “style” chairs.   I suppose I associated the style with cheap, clunky, poorly proportioned factory furniture.  I had zero knowledge of this craft.  Curtis’s chairs are radically different from anything I had ever encountered.   They are lively, delicate, and balanced, with a stance and poise that is unmatched.   His turnings are sublime in their crisp flowing lines, and the toolmarks left on shimmering surfaces bear testimony to decades of skill and restraint.    Now that I’ve gotten to sit in many of his chairs, I can also attest to their incredible comfort.  The photographs of the chairs first drew me in, and then I began to absorb what he was saying about HOW these chairs are made.  My eyes opened wide as I realized that this amazing fine furniture is constructed in a fundamentally different way, from start to finish, from anything in my experience.   Then I read a line which began “the hardest part for students…” and a light bulb went off.   Students??  Maybe I could do this!

I felt that my opportunities for formal woodworking instruction had long passed me by-I had no money for school, I had learned on the job and on my own, and now I just needed to keep on truckin’, try to survive and scratch out a living.   But Curtis put me on his wait list, and eventually he let me know that he had an opening.  My fiance Michele was so totally supportive-despite the financial obstacles, she basically commanded me to go!  And so it was I found myself pulling into the little village of Jonesborough with four bald tires and the check engine light on, eager to learn something new.

iphone spring 2014 198 (600x800)

Jonesborough is a quaint and friendly little town.  I explored main street for a bit and headed a few miles down the road to a local waterpark/campground to set up camp for the week.  Being early March, the park was deserted, beautiful and quiet.   It suited my contemplative state of mind, and the sense of being on a solo mission into the unknown.  Home sweet home for the next seven days.

iphone spring 2014 188 (600x800)

Class began the next day at 8am, and myself and the other two students arrived and greeted each other in the shop.  Curtis and his wife Marilyn made us all feel so welcome.  They are easy going, charming and talkative, with a kindness and love of life that radiates outward toward others.  Their home and shop are nestled near the center of town, on a small rise overlooking the village.  It’s a beautiful spot, and the feeling of walking down through their terraced gardens and stepping foot in the shop for the first time was nothing short of magical.  This was unlike any other woodworking environment I had ever experienced.  Curtis has a great website, http://www.curtisbuchananchairmaker.com/, and he also has a wonderful slideshow which describes his work and his shop far better than I ever could. http://www.finewoodworking.com/item/114435/curtis-buchanan-windsor-master

iphone spring 2014 217 (768x1024)

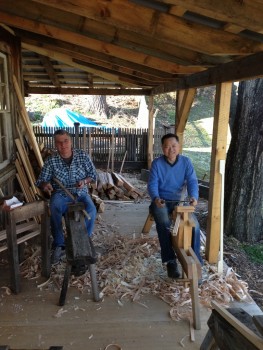
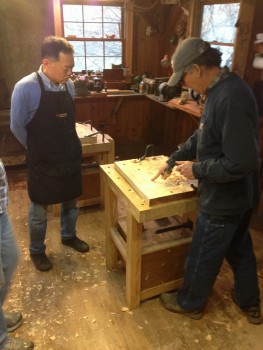
I was excited to be learning alongside two others:  Steve, from South Korea, and Jamie, from Australia.  Three continents represented!  Steve was beginning a journey into  woodworking later in life, and his zeal for the craft was inspiring.  Jamie was returning for his second class with Curtis, and his passion for Windsor chair making was tremendous.  We were all thrilled to be there, so with a hot cup of coffee and Curtis to guide us, we dove into the work!  We headed outside to examine a white oak log lying in the yard…

iphone spring 2014 226 (768x1024)

I’ll pause here to say that in the almost two years that have passed since that week in Tennessee, I’ve tried to distill in my mind just what it is about Windsor chair making that is so unique and different from other styles of woodwork.  Firstly, the entire chair is made with hand tools.  More specifically, edge tools.  Therefore, sharpening skill is of paramount importance.  If one cannot sharpen a drawknife, adze, scorp, travisher, scrapers, planes, chisels, carving gouges, spokeshaves, auger bits, and lathe tools, there is no chance of even beginning to make a chair.   Well, at least you don’t have to sharpen your froe!  And while most styles of woodworking incorporate some hand tool work, chairmaking is entirely handwork, start to finish.  Seriously fun stuff.

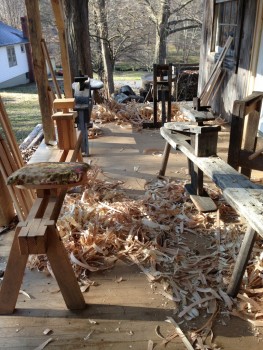
So we split some oak and rived it into blanks for arm rails, crests, and spindles, then headed up onto the porch to listen to the chirping of the birds and begin working this fresh green oak.   Seated on the shave horse, we began with the drawknife, which brings me to to the second unique and wonderful aspect of chairmaking.

iphone spring 2014 204 (768x1024)

Working green wood in this way brings a person as close to the material as is humanly possible.   To say it another way, it lets us understand and connect with the very essence of what that tree is-did it grow fast or slow; on a hill or on flat ground; with a gentle curve or straight and true; is the wood supple and creamy or brash and brittle; are the wood fibers long and even or short and meandering; what is the very nature of this material?  All of these questions begin to be answered when we bring a razor sharp drawknife to bear, and start to follow the chairmakers path.

At the tablesaw,  we use the fence to guide the cut,  and with carbide steel teeth and horsepower, we easily cut wood in a straight line, regardless of how that tree had grown.  Conversely, with a rived blank of green wood and the drawknife, we aim to smooth a surface of the wood while following the long wood fibers accurately.  The wood itself is our guide.  Indeed, one can create a square spindle blank that follows a single growth ring from one end to the other.  This yields a blank that is as strong as possible, has no run out and therefore can be worked beautifully in either direction, and will steam bend without failure.   It need not be straight-in fact, curved pieces end up being advantageous when assembly begins.   Using the drawknife in this way gives one amazing feedback about the material, is meditative and addicting, and just plain fun!

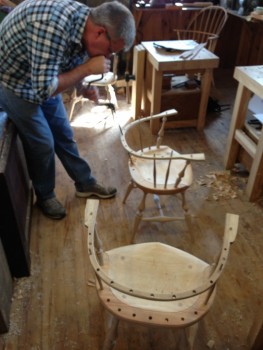
A chair in seven days.  It seemed a tall order.  Curtis has been teaching a long time,  he knows what needs to happen, and we progressed at an easy pace.  There was lots of story telling, laughter, and comraderie-the relaxed pace and chance to simply focus and learn to use these tools was a joy.  Which brings me to my third point.  Joy.  Not a concept that always goes along with work.  In this case, it most certainly does.  The various tasks in chairmaking include: splitting and riving logs, whittling and spokeshaving, planing and carving seats, carving ears and knuckles, drilling and reaming angled holes, turning at the lathe, steambending, gluing and assembling, painting and oiling.  All of this work is pleasurable, meditative, and soulful.  It all fosters and sustains contentedness, moment to moment, day to day.

iphone spring 2014 245 (768x1024)iphone spring 2014 220 (768x1024)

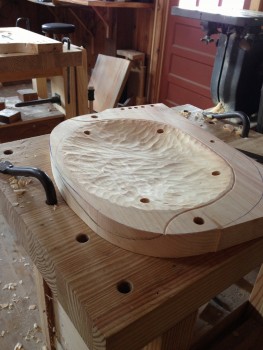
Seat carving and arm post fitting.  You’ll notice the bandsaw in the backround-Curtis went without one for years, and it only sees use in cutting out the seat, and for various small tasks.  It isn’t needed, but it is a small concession to the machine age.

iphone spring 2014 225 (768x1024)

Scorp in hand, Curtis discusses the subtleties of seat carving.

iphone spring 2014 255 (768x1024)iphone spring 2014 259 (768x1024)

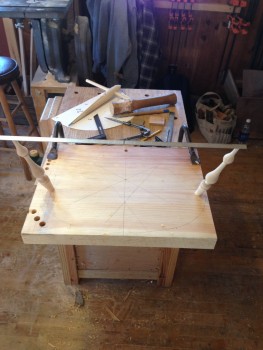
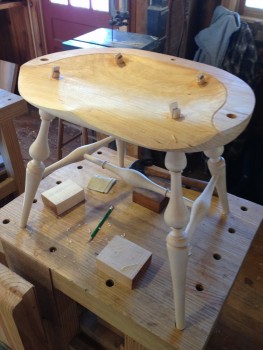
Fitting the understructure.  There are many opportunities to correct angles and reach for perfection during the process.  Curtis supplies the turned components for the class, as turning is a craft that takes years to master.  His turnings, straight off the skew chisel, are as smooth as a baby’s butt.  He is a true master.

iphone spring 2014 265 (768x1024)

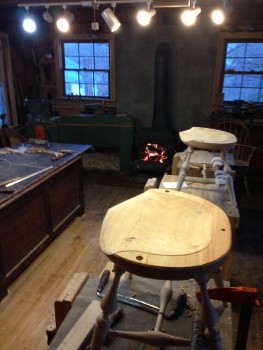
Early morning in the shop, mid week.   I remember this morning vividly.  It was cold, and I had slept little, my mind filled with new thoughts.  Pancakes and eggs at a little diner in town, the news on tv-a jetliner had vanished…it seemed a million miles from my reality-then off to the shop.  I started a fire and soaked up the quiet early dawn calm of the woodshop.  With the crackling of the fire and the scent of fresh oak and pine filling my senses, I pondered the vibration of this place.  A compact little timber frame, it feels perhaps more like a church than a shop-a place where things can still make sense, where one can be at ones best, a place to create that is close to nature and pure in its focus.  A fine shop indeed.  We were halfway through the week, and I wished it wouldn’t have to end.  This craft had me deeply hooked already; I was changing and I could feel it.  Soon the others would arrive and another day of stories, laughter and chair building would begin.

iphone spring 2014 275 (768x1024)

Curtis reads the angle for the center spindle-everything emanates from the plane of the seat.  Balance and symmetry are the goals-if it looks good, it is good.  A harmony of good proportion, comfort, strong tight joinery, and crisp tool marks blend to create a fine chair.

iphone spring 2014 293 (768x1024)

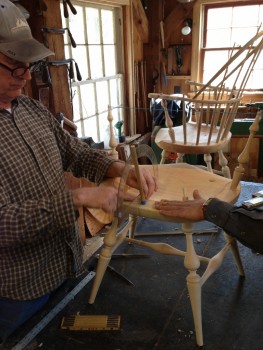
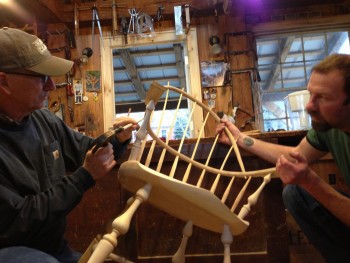
Jamie drills for the long spindles.  This stuff is seriously, seriously fun.  Drilling with  auger bit and brace is not merely quaint-it creates a crisp clean hole, allows a predictable depth by counting turns, and is quiet and calm which encourages focus.  And it’s fun-did I mention that?  There are also times where the electric drill is very useful, but for the most part I prefer the brace.  Below, Curtis taps a wedge into the back bow, as the chair finally comes together.

iphone spring 2014 305 (1024x768)

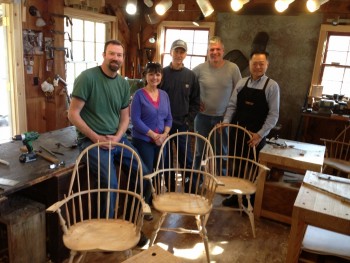
By the end of the week, we all had made fine chairs, and had opened the door to a new way of working wood.   Curtis’s teaching style is so relaxed and generous, his knowledge deep and nuanced, and his stories captivating and witty.  I was continually struck by the feeling of connectedness I sensed between him, his tools, and the wood.  Like a virtuoso musician,  an Olympic athlete, or a brilliant chef, he works with a fluid, calm certainty that needs to be experienced firsthand to be truly understood.  I suspect that one reason he finds himself at this place of mastery is because of the contentedness that this work imparts upon a person.  Curtis would often say that “contentedness is underrated.”   This was further evidenced in the life he and his family have built.  He and Marilyn are an incredible team, and they’ve opened their home and their lives to students who hail from around the globe.  Harmony with nature, hard work and creativity, and connection to people-these are the lessons I learned in Jonesborough.  I came away with new friends, bonded by a common interest in craft and connection to nature, as well as a new respect not just for making a living, but for making a life.

iphone spring 2014 295 (1024x768)

My steadfast Kia got me home, and I quickly built a shave horse, lightbulb kiln, steambox, and seat carving bench.  I purchased a 1940’s lathe, and began acquiring chair making tools.   I’ve since built a handful of Windsors and have several original designs in progress.  Chair making skills have also informed other aspects of my woodworking-a steam bent spindled crest found its way on top of a bakers rack, and tapered tenons are used to join legs on various pieces.  I’ve no doubt that I will continue to grow into chair making, even as I work wood with other methods.  The craft has got a hold of me, and I am captivated.   To the woodworker who has not yet delved into green wood, I would offer strong encouragement-you may unlock a world that you didn’t even know existed, replete with birdsong and happiness.

iphone spring 2014 211 (768x1024)


Glue some boards together

For most amateurs and professional woodworkers alike, this fundamental task is one of the first things we learn.  From a simple cutting board or coffee table, gluing boards together is often the beginning of a project.  I’ve decided to describe my methods because although the topic is indeed basic and countless how-to articles exist, everyone has their ways and perhaps I have a little something to add.   Now, there’s a thousand and one ways to do something,  and it’s true.   My method works well for me,  it’s fast and efficient, and it just might work for you.

I start at the jointer, which needs to be tuned up in order to actually make boards flat.  Buy a machinists straightedge (mine is 38″ aluminum- from LeeValley) and some feeler gauges.  Take the time to get it set up right.  Face joint the boards to remove any twist and make one side flat, then joint an edge.   Rip the other edge parallel and thickness plane to create flat, square stock.  Arrange the boards to your liking (sap to sap, heart to heart, pith side same face, if possible) and letter A, B, C, etc across the joints.

marking boards

Now head back to the jointer to finesse the edges for gluing.  I take a light cut and move slowly, keeping steady pressure against the fence.  When I’m almost in the middle of the board, I subtly increase pressure over the cutterhead and then shift that pressure to the outfeed table through the cut.   Mating edges have opposing sides toward the fence-if one board has the letter A toward the fence, its mate will have the letter A facing away.   When I finish an edge, I gently and slowly run my finger down the full length of the board-it’s amazing how tuned our sense of touch can be.  This lets me discover any snipe or bobble that exists.  Be kind to those crisp corners now, no dings allowed!  Put two boards together-they will make a sweet click if the fit is good.  The fit needs to be absolutely perfect.  Light should not be visible between two edges stacked together.   That being said, I usually prefer my joints to be very slightly sprung (open) in the middle, especially when more than four feet in length.  With the board clamped at the bench, I use a sharp jack plane set for a whisper thin cut and take a short pass in the middle, then a longer pass, avoiding the ends of the board completely.  I’m talking about less than a 64th on a six foot board.  With edges prepared, I am ready to glue.

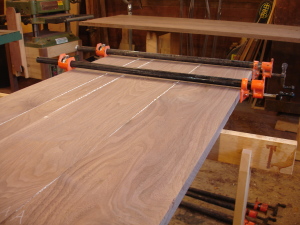
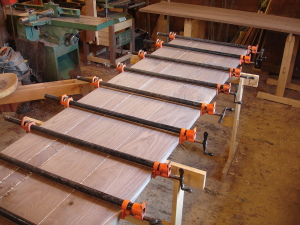
These days I find that I use Titebond III for virtually everything.  It’s waterproof, has longer open time, and doesn’t dull tools when cured.   I love the stuff.   As for clamps, I prefer 3/4″ pony pipe clamps for this task, and always with black pipe.  Some people use galvanized pipe because they worry about black pipe staining boards when pipe, glue, and wood come into contact.  I don’t ever allow the pipes to contact the wood, so this isn’t a problem.  Galvanized pipe, however, will let the clamps creep, which is counterproductive, especially when glue is setting fast and things start taking a turn for the worse!   I always glue up on sawhorses, and I rarely use cauls.  This keeps setup simple.    Space the sawhorses so that the boards lay flat on their own, sight them to be sure there is no twist, and set the edges up to glue.  I never use biscuits or dowels.  They do not add strength, and I believe that they actually introduce an anomaly into an otherwise perfect situation.  A single bead of glue on each edge.  What to spread it with?  Luckily, mother nature has given you the perfect glue spreader-your index finger!    Spread the glue with a light touch to avoid pushing it over the edge, then take another pass to spread it out.  Then, take a final pass with fairly strong pressure to even out AND remove any excess glue, which you will wipe on the rag you remembered to have handy.   This pressure is important in order to create an even and THIN coat of glue, and thus avoid having most of it drip all over the floor, the clamps, your shoes, etc…

Now, time to clamp.  With boards set lightly together, I put a first clamp a few inches from one end, adjusting the edges flush and applying only moderate pressure on the clamp.  I keep the clamp up off the surface of the boards so that the pipes don’t touch, and the force of the screw is centered on the thickness of the board.  This works on boards up to about 1 1/8″ thick.  It the screw is centered (or just below center),  the boards will want to lay flat, and there will be even force on the joint, which is crucial for a good bond.  Continue to add clamps every twelve inches or so.  Tighten each new clamp only lightly, then touch the joint to check for flush–flex the far ends of the boards lightly to bring them flush at the clamp location.   The glue has enough slip and grab to allow subtle  adjustments as boards are flexed and persuaded into alignment.  The trick is to fuss the clamp pressure so that as you flex the boards they will “stick” where you want them.  After three or four clamps are on, go back and tighten the first few.  Continue down the length of the boards.

adding clamps

If there is an alignment issue at the far end, use a large handscrew to pull the ends of the joints flush, and tighten the last clamp.  Check that all the clamps are snug, but not crazy tight!  Set a ruler across the boards to make sure they are laying flat- if not, adjust clamps up or down slightly to correct.  For boards thicker than 1 1/8″, the procedure is the same, except I will alternate clamps above and below, and decrease the spacing slightly.  If I have used the correct amount of glue, it will bead on the bottom of the boards but not drip.

clamps

If it’s 5 o’clock,  I’ll head to fridge now and crack open a beer.  Don’t touch that glue!  Wiping the glue with a wet rag will only serve to dilute it and force it into pores of the wood-not helpful.  After about one hour, the clamps can come off, and when the beaded glue is good and firm, a cabinet scraper will take it off cleanly with little effort.   That’s about it-with a bit of practice, perfect glue joints and flat panels can be achieved with predictability and confidence.   Go ahead and build that table top!

Influences and inspiration

In a few months I will celebrate my 44th birthday.   That number seems curiously large as I stare at it, and it leads me to reflect on this winding  journey and where I stand in it.    All in all, I can say with some certainty that I like the view from the road I’m traveling on.    Somehow I have found my trade, and in that work, a  purpose.

sawing logs oct 2014 001

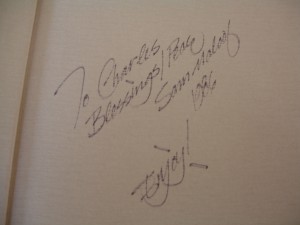
When I was 16 years old, a book appeared on our coffee table, entitled Sam Maloof, Woodworker.   My father, an amateur woodworker, had attended a workshop by Mr Maloof  in Aspen, Colorado, and returned with a signed copy of his book and tales of a very inspiring man.  I couldn’t put the book down, and I poured over the glossy photos endlessly while reading and rereading every paragraph, as if I hoped to squeeze a little something more out of the book each time I picked it up.  I didn’t realize it at the time,  but that book was answering questions for me that I hadn’t even known I was asking.  This is what you want to do with your life…

My mother is a Julliard trained soprano; my father,  a chemist.    They both instilled in me a love of music, art, food, and creative expression.   I was a shy kid and a bit of a loner.   I loved to draw and build things, and to ramble through the deep woods that surrounded our home in Rochester, NY.  I felt more at home in those woods than I did up on the street, and in that setting my imagination was free to take me to those magic places that only children can go.  I believe this reverence for nature formed the foundation for my creative spirit.

There were other woodworking books on our shelves, by a man named James Krenov, and my father would spend hours studying them, then head down to the basement workshop to plane boards and chop dovetails as I looked on with interest.  I was 8 or 9 years old at this point, and loved being with dad down in the shop.  I clearly remember  the smell of cherry and walnut as he passed boards over the jointer, then ripped and crosscut with the big radial arm saw-what a scary machine that was!  The Krenov books were at first too wordy for me, but I found myself taking them down again and again as I grew older, gleaning a  bit more each time of what the man was saying, and finding myself drawn to the simple beauty of his cabinets and the passion of his philosophy.  Today these books rest on a high shelf in my study, and when I open them they still reveal new things and resonate with me all the more.


sawing logs oct 2014 002

Fast forward to the age of 25.  I was working as a dinner waiter in Austin, Texas, feeling more than a little confused about what to do with my life.  On my 25th birthday, I felt a panic, and made a simple resolution.  I was done waiting tables:  whatever job was to come next, I had to be learning something absolutely tangible, and by the age of 30, I was going to be good at something.   A close friend who was a carpenter gave me a job.    After working with my buddy for a few months, I decided I wanted to frame houses.   Austin was booming, and beautiful homes were being built everywhere.   I loved the sight of these towers of blonde wood rising against the blue sky, carpenters climbing high and creating ordered beauty with lumber and nails.  Tangible.    I framed custom homes for five years, learned to work harder than I ever imagined possible, and then realized something else:  I wanted to get out of that burning Texas sun.  I took a job in a commercial cabinet shop, building laminate covered cabinets for Motorola and Intel, whole office floors of particle board boxes.  Fifty-six hours a week, low pay, and very little real wood.  I began to think about Sam Maloof and James Krenov…how could a person get THERE?   It seemed impossible.

I built myself a workshop on a piece of hardscrabble ground near Kendalia, Texas, and set out on my own, doing carpentry, remodeling, cabinets, an occasional table or bookcase.   Life in the hill country was sweet, and I was beginning to move toward  my goal of building fine furniture.  Then life and love brought me back to my college town of Ithaca, NY, and I caught a very lucky break.  I took a job with a furniture/cabinet maker working  in the barn behind his house.  His name was Chris Lowe, and he became my mentor and boss for the next three years.  I began to learn much more about real joinery techniques, solid wood, and hand tools.   His skills and experience were vast and rooted in traditional methods and uncompromising quality.  Together we built kitchens, chests of drawers, staircases, and most importantly, the case for the Cornell Baroque Organ.  http://baroqueorgan.cornell.edu/  This job took two full years and was a total immersion in handwork.  We were driven and consumed in our focus.  It was the job of a lifetime and we knew it.  We built a towering organ case of white oak, with no sandpaper allowed and a total imperative for authenticity.  With the organ complete,  I set up my own shop in the barn behind my home in Brooktondale, and I carry on working in wood, the road and the view becoming more fascinating each day.

cornell organ oct 2014 007

Woodworking is an immensely humbling craft, and the process of teaching oneself is both frustrating and rewarding, often at the same time.  As I delve deeper, I find that I am influenced by many other woodworkers, and I have begun to distill for myself what it is I am moved by, what resonates immediately, what draws me in and causes me to simply say,  “I like this.”  I try not to analyze, at least not at first.   If I am drawn strongly to something, then I will start to ask myself why-is it the proportions and design, the physical weight or lack thereof, the joinery or technical mastery, or something more difficult to pinpoint?  We can all answer these questions for ourselves, and this is the beauty of individual taste.   It opens the door for craftspeople and buyers to make connections  naturally, united by that simple phrase “I like this.”   Beyond Maloof and Krenov, I am influenced and deeply inspired by the work of Hank Gilpin, Alan Peters, Curtis Buchanan, John S Everdell, Thomas Hucker, Wharton Esherick, and Hans Wegner, among  others.  The greatness of others work can be very daunting, but I have come to believe that it is much more important to do something well than to do something new.  In this sense I put myself squarely on the side of craft, versus in the world of art.   Building quality, functional furniture from local woods is my primary goal, and if I begin to find my own voice through that work, so be it.  The road is long, and I have just begun.

iphone july 2013 392